Microsoft Exchange 2019 - SMTP Connector - Setup Guide
Important Points
- First you need to make sure the address(es) you will be sending from have been authorised for your account in our Control Panel .
- You cannot configure your Exchange server to automatically forward email to a remote email address using your AuthSMTP account, for more information please see - Can I use AuthSMTP to automatically forward email?
- These instructions assume your Microsoft Windows server has already been setup, you have installed Microsoft Exchange Server 2019 and your incoming email is setup and working.
- The guide will walk you through creating a new SMTP Connector for general use, any further configuration to limit use of this connector to specific parts of your network or users is your responsibility, Microsoft can provide you with support for Exchange 2019 via their website - Exchange 2019 General Documentation.
- These instructions are only for Exchange Server 2019 - for other programs please see How To Setup AuthSMTP or contact us.
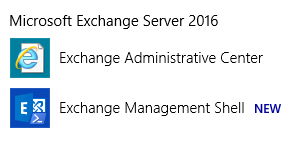
Step 1
- Open the 'Exchange Administration Center' (EAC)
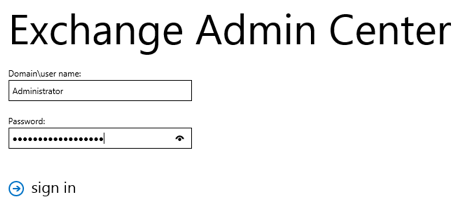
Step 2
- Login to the EAC as an administrator
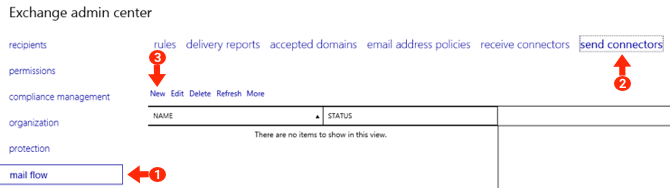
Step 3
- In the left hand column select 'Mail Flow'
- Go to the 'Send Connectors' tab
- Click 'New' to add a new send connector
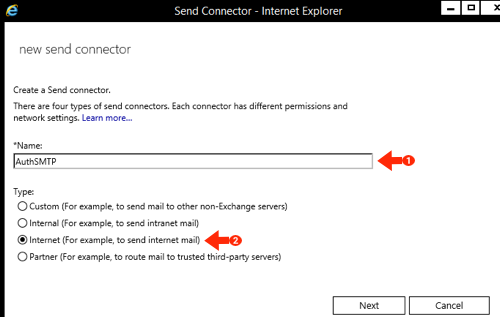
Step 4
- Enter the name as 'AuthSMTP', this is just a reference for the connection
- Set the type to 'Internet'
- Click 'Next'
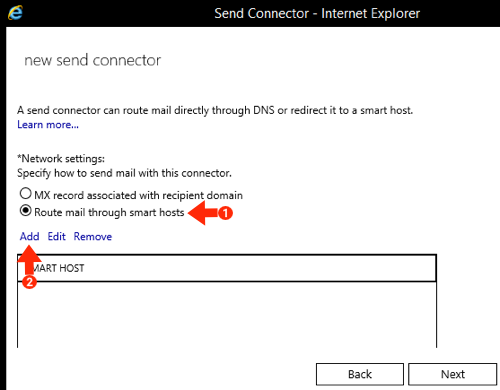
Step 5
- Tick 'Route mail through smart hosts'
- Click 'Add' to add new smart host
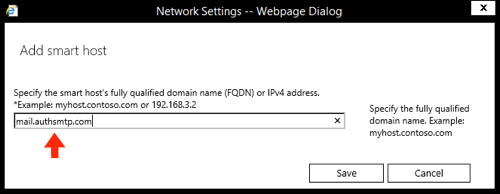
Step 6
- Enter the SMTP hostname issued during account activation, this is typically 'mail.authsmtp.com'
- Click 'Save'
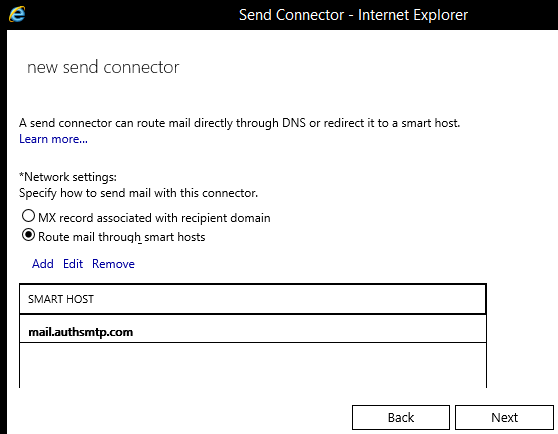
Step 7
- You will now see the smart host listed
- Click 'Next'
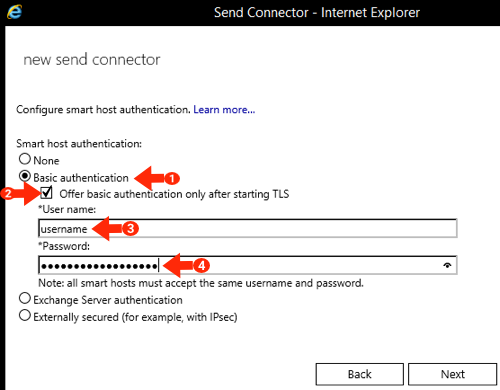
Step 8
- Tick the option for 'Basic Authentication'
- Tick 'Offer basic authentication only after starting TLS'
- If you don't want to use SSL / TLS please leave this box unticked.
- Enter your AuthSMTP username
- Enter your AuthSMTP password
- Click 'Next'
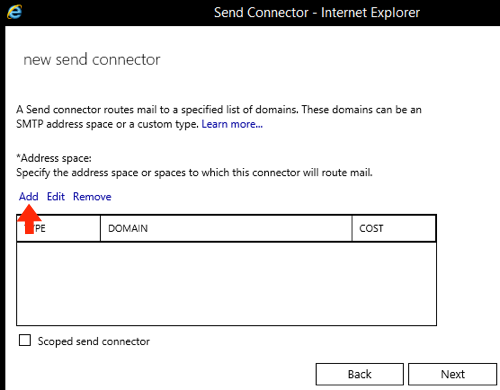
Step 9
- Click 'Add' to add a new address space that is permitted to use the smart host
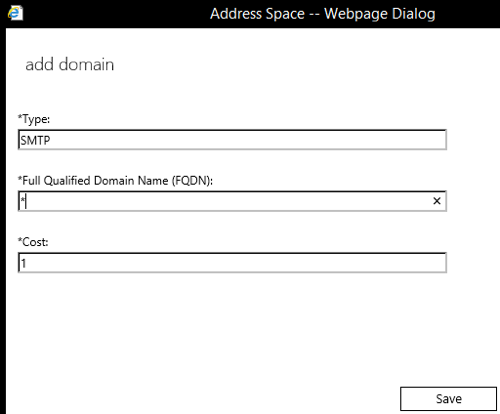
Step 10
- Set the type to 'SMTP'
- Set FQDN to '*' meaning all domains
- Set cost to '1'
- Click 'Save'
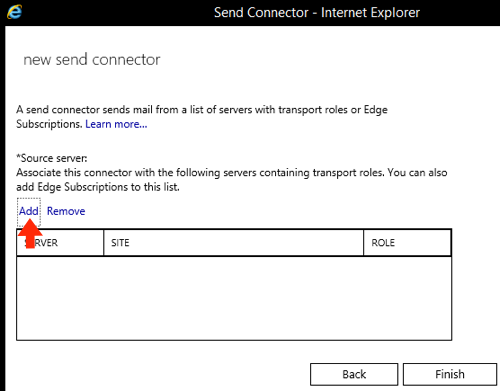
Step 11
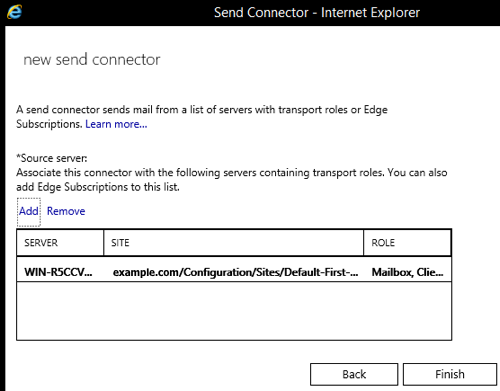
- Click 'Add' to add a permitted source server
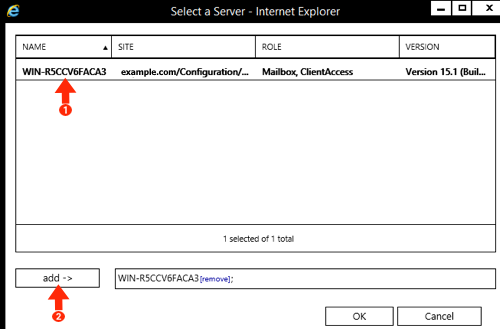
Step 12
- Click the appropriate server(s) from the list and click 'Add' for each
- Click 'OK'
Step 13
- Click 'Finish' to save the connector
Step 14
- You will now see the SMTP connector has been created
- You may need to restart the Exchange SMTP / Transport services for the changes to take effect

- The basic setup is now complete and you should be able to send emails from your Exchange server / network
- You may wish to change the SMTP port on which you connect to our service
Troubleshooting
- The easiest method of troubleshooting issues with SMTP connectors in Microsoft Exchange is to enable protocol logging, please see - Troubleshooting Exchange 2019 / SMTP Protocol Logging
- The common errors that can happen when trying to configure our service will be logged to your account history in the Control panel -> Account Usage -> Error Log with the exception of incorrect username / password errors, so if you are having a problem please check those error logs.
- If you have questions specifically about configuring or troubleshooting Exchange 2019 please use the Official Microsoft Exchange 2019 Documentation - due to the complexities of Microsoft Exchange we can only provide basic troubleshooting advice.