Mozilla Thunderbird 2 - Default Port - Setup Guide
Important Points
- First you need to make sure the email address(es) you will be sending from have been authorised for your account in our Control Panel .
- These instructions assume your email account has already been setup and is collecting email correctly.
- Take a note of any settings you change.
- Only change the items specified - you should not need to change either your email address, POP3 server, POP3 username / password.
- These instructions are only for Mozilla Thunderbird 2.0 - for other email programs please see How To Setup AuthSMTP or contact us.
- We have instructions for both default SMTP port and alternate SMTP port configurations - alternate port is generally used if your ISP blocks the normal port 25 SMTP access (as many do these days!).
Step One
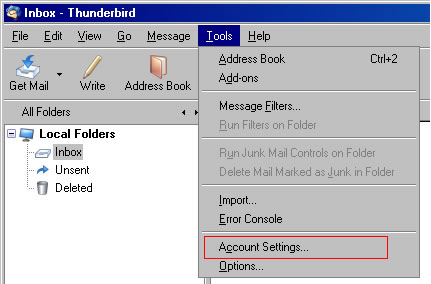
- Load Mozilla Thunderbird 2.0
- From the main screen open the 'Tools' menu and then select 'Account Settings...'
Step Two
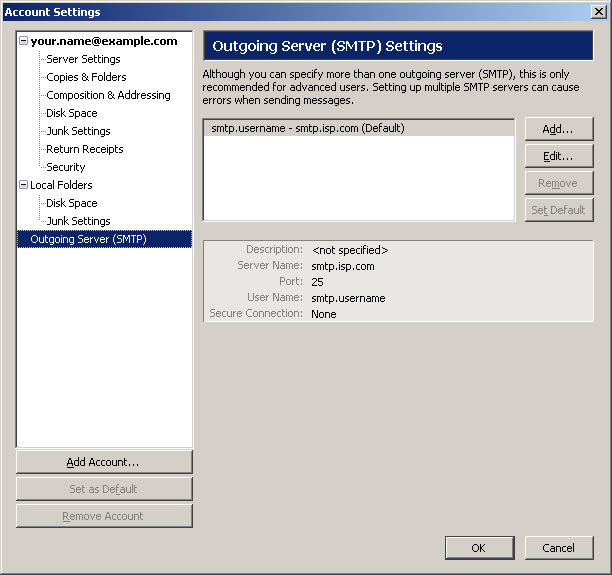
- Select 'Outgoing Server (SMTP)' in the left-hand column
- Click 'Add...'
Step Three
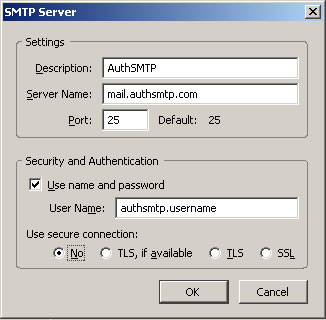
- Enter 'AuthSMTP' as the description
- Enter the 'Server name' as the SMTP server we supplied with your signup email
- Enter the AuthSMTP username (it will ask for your password when you first go to send a message)
- IMPORTANT: 'authsmtp.username' is an example - if your AuthSMTP username was 'ab12345' enter it as that and *not* as 'authsmtp.ab12345'
- Make sure 'Use secure connection' is set to: No
- Click 'Ok'
Step Four
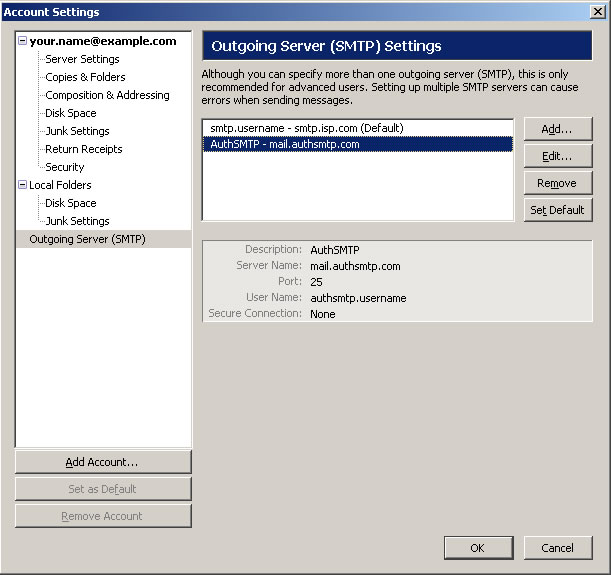
- You now have a separate SMTP account setup using the AuthSMTP service
- You may wish to set this as the default SMTP server by clicking 'Set Default'
- Click 'OK'
Step Five
- You should now be back to the main Thunderbird 2.0 screen
- Close Thunderbird 2.0 and then reload
- Check you are online then test to ensure you can send mail correctly
- It will prompt you for your AuthSMTP password the first time you try to send email
- All done!