Max Bulk Mailer - Default Port - Setup Guide
Important Points
- First you need to make sure the email address(es) you will be sending from have been authorised for your account in our Control Panel .
- Take a note of any settings you change.
- Only change the items specified.
- These instructions are only for Max Bulk Mailer 6.x / 7.x / 8.x - for other email programs please see How To Setup AuthSMTP or contact us.
- We have instructions for both default SMTP port and alternate SMTP port configurations -alternate port is generally used if your ISP blocks the normal port 25 SMTP access (as many do these days!).
Step One
- Load Max Bulk Mailer by clicking on the desktop icon
Step Two
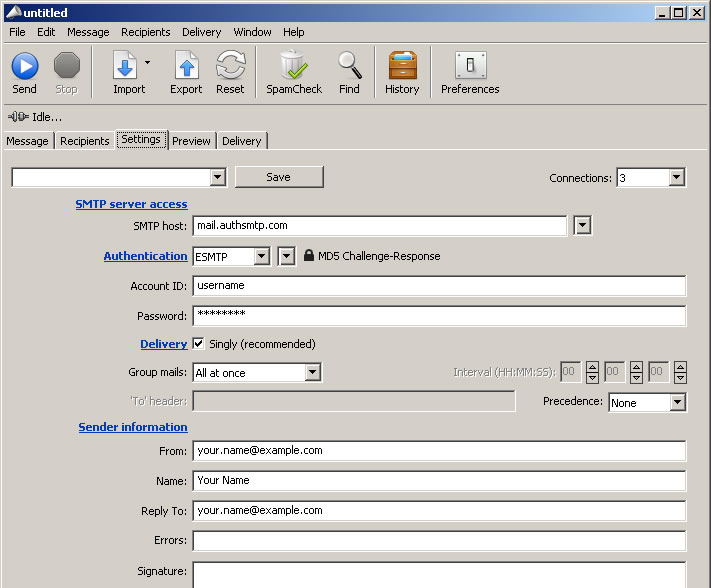
- Select the 'Settings' tab
- Change the 'SMTP Host' server to the one in the email sent to you when your account was setup
- Change the 'Connections' option to '3'
- Changed 'Authentication' to 'ESMTP'
- In the second drop-down menu next to 'Authentication' to 'MD5 Challenge-Response'
- Enter your AuthSMTP username in the 'Account ID' field and then your password
- Tick 'Delivery' so that messages are sent 'Singly'
- In the drop-down for 'Group mails' select 'All at once'

Step Three
- To save the settings click the 'Save' button at the top of the tab
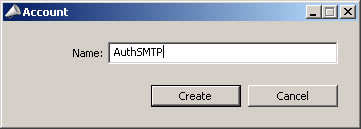
- Enter a name for the service, we recommend 'AuthSMTP'
- Click 'Create'

Step Four
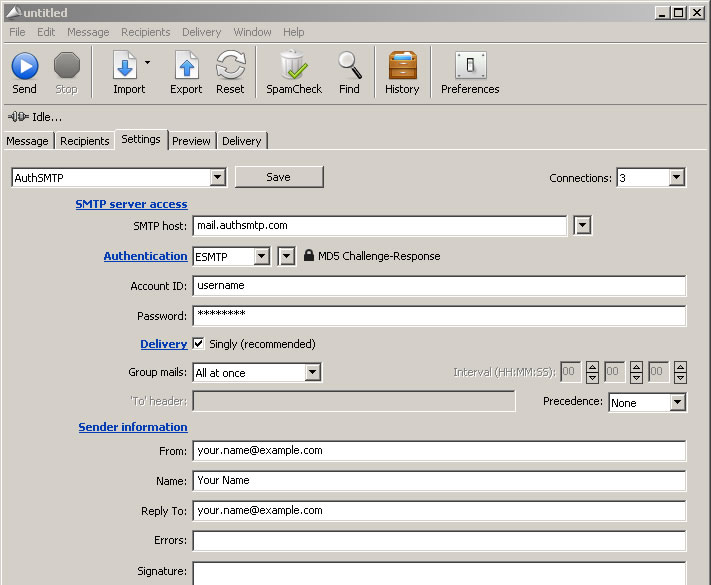
- You should now see that it has saved all of your settings as an SMTP profile

- All done!
