Mac Mail - Lion 10.7 - Alternate Port - Setup Guide
Are you using the latest version of Apple's Mac OSX?
Please see our Mojave 10.14 Mac Mail SMTP server setup guide here.
Important Points
- First you need to make sure the email address(es) you will be sending from have been authorised for your account in our Control Panel .
- These instructions assume your email account has already been setup and is collecting email correctly.
- Take a note of any settings you change.
- Only change the items specified - you should not need to change either your email address, POP3 server, POP3 username / password.
- These instructions are only for Mac Mail on Lion 10.7 - for other email programs please see How To Setup AuthSMTP or contact us.
- We have instructions for both default SMTP port and alternate SMTP port configurations - alternate port is generally used if your ISP blocks the normal port 25 SMTP access (as many do these days!).
Step 1
- Open Mac Mail on Lion by clicking the Icon
Step 2
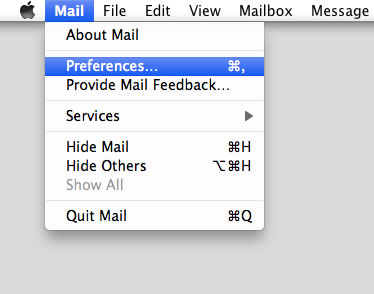
- Go to the Mac 'Mail' menu and click 'Preferences'
Step 3
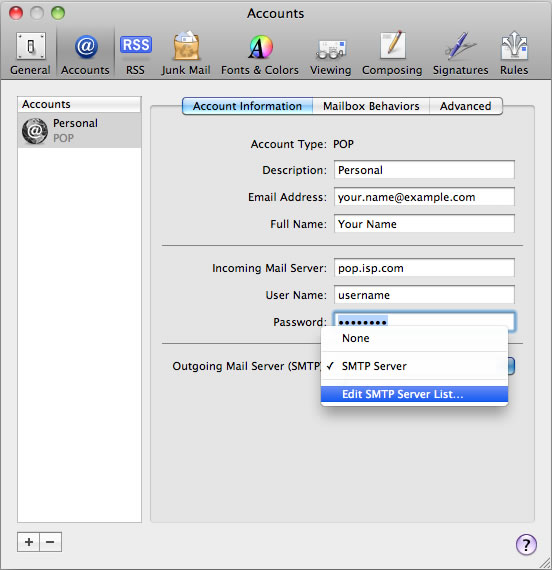
- Click on the Mac Mail account you wish to edit, you may have multiple accounts so if you do you will need to edit each one separately
- Click on the 'Outgoing Mail Server' drop down menu and select 'Edit SMTP Server List...'
Step 4
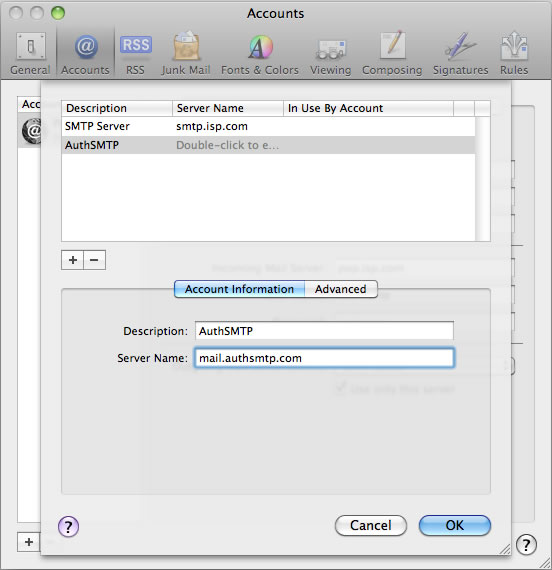
- Click on the plus (+) button to add another SMTP server
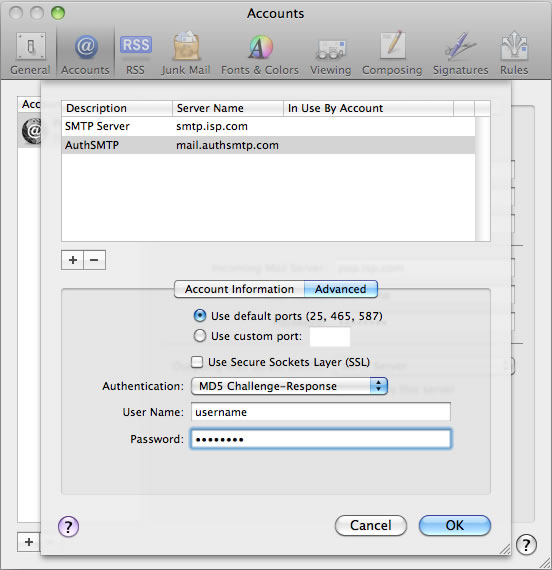
- For the description enter 'AuthSMTP'
- For the Server Name enter 'mail.authsmtp.com'
Step 5
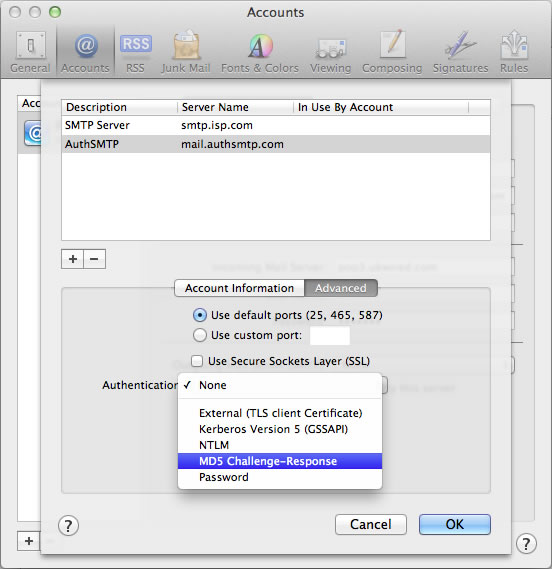
- Go to the 'Advanced' tab
- Click on 'Authentication' and select 'MD5 Challenge-Response'
Step 6
- Enter the AuthSMTP Username and Password that has been emailed to you
Step 7
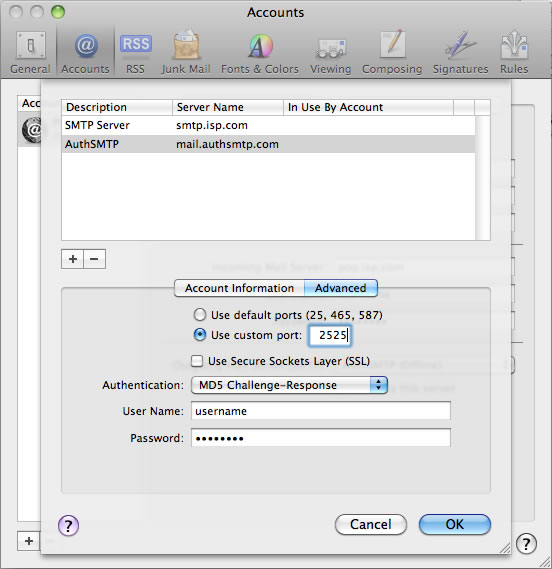
- Click on the radio button for 'Use Custom Port' and enter the port number as '2525'
- Click OK
Step 8
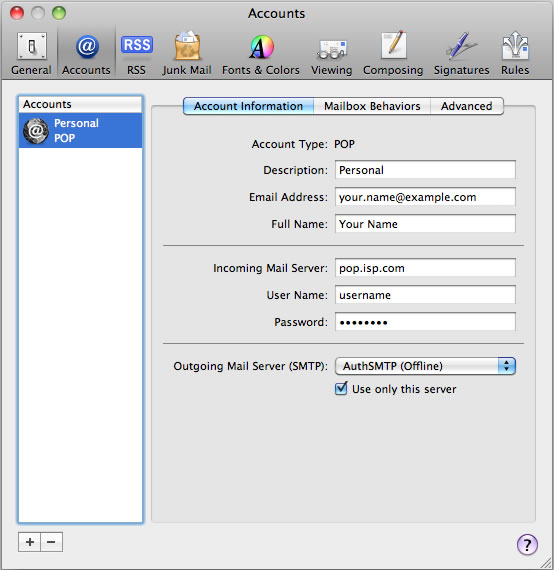
- You have now setup the AuthSMTP outgoing mail server
- Please ensure that 'AuthSMTP' is selected in the drop-down menu next to'Outgoing Mail Server'
- Close the window
Step 9
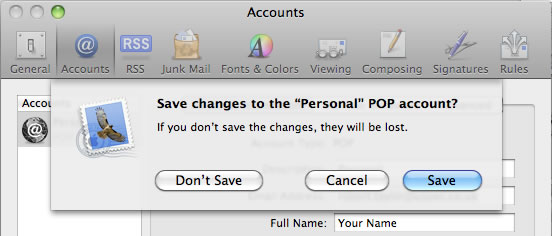
- When prompted click 'Save' to keep the changes
Step 10
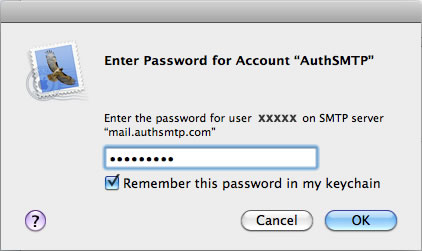
- When you first click 'Get Mail' or go to send an email you may need to re-enter your AuthSMTP password
Step 11
- All Done!
