Microsoft Windows 10 Mail App
Important Points
- These instructions only apply if you are using the default Mail App included with Windows 10.x.
- First you need to make sure the address(es) you will be sending from have been authorised for your account in our Control Panel .
- These instructions assume you have already setup your email account in the Mail app, you are receiving emails and are currently sending emails out through Microsoft's servers or another SMTP server.
- These instructions are only for Windows 10 Mail App - for other programs please see How To Setup AuthSMTP or contact us .
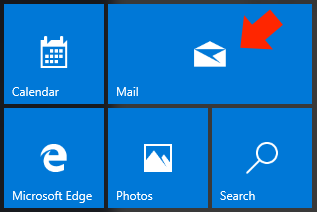
Step One
- From your desktop click the Windows button in the bottom left-hand corner

Step Two
- Open the Mail App
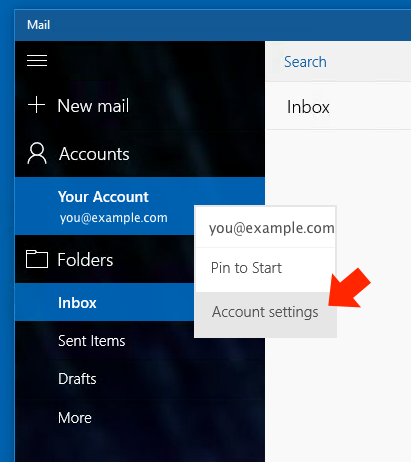
Step Three
- Right-click on your email address in the left-hand column
- Click 'Account Settings'
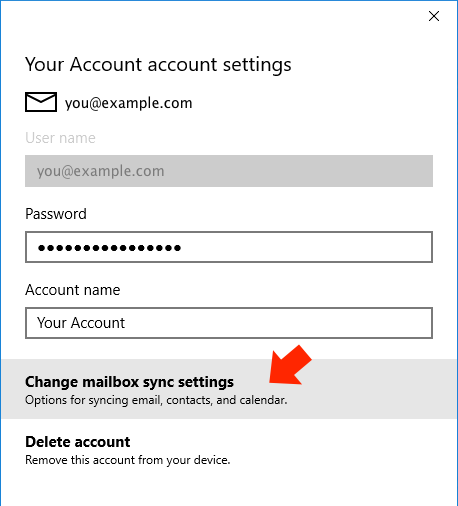
Step Four
- Click 'Change mailbox sync settings'
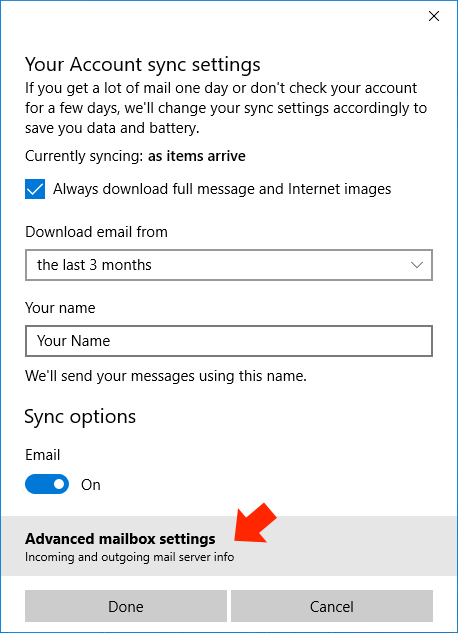
Step Five
- Click 'Advanced mailbox settings'
Step Six
- Scroll down to the outgoing email server section...

Step Seven
- Enter the SMTP server we sent to you in your confirmation email, this is typically 'mail.authsmtp.com'
- We recommend that you use an alternate SMTP port such as 2525 rather than the default 25 so type ':2525' on the end of the SMTP server so that it reads as 'mail.authsmtp.com:2525'
- Other ports available are 23, 25, 26, 325 (non-SSL only).
- Tick 'Outgoing server requires authentication' and leave the other box un-ticked, this will display the username and password field
- Enter your AuthSMTP username which should be something like 'aa12345'
- Enter your AuthSMTP SMTP password
- Tick 'Require SSL for outgoing email'
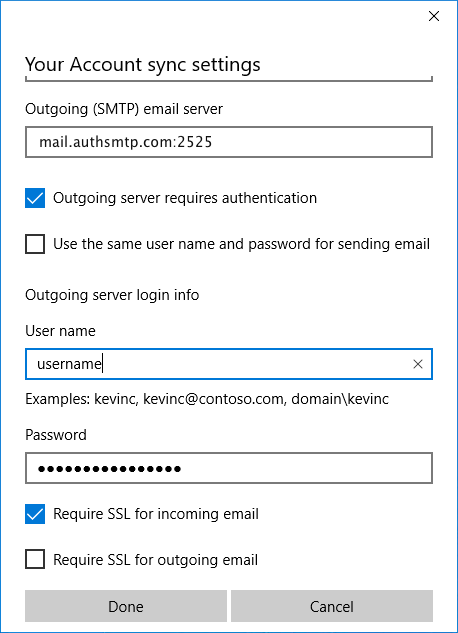
- Click 'Done'
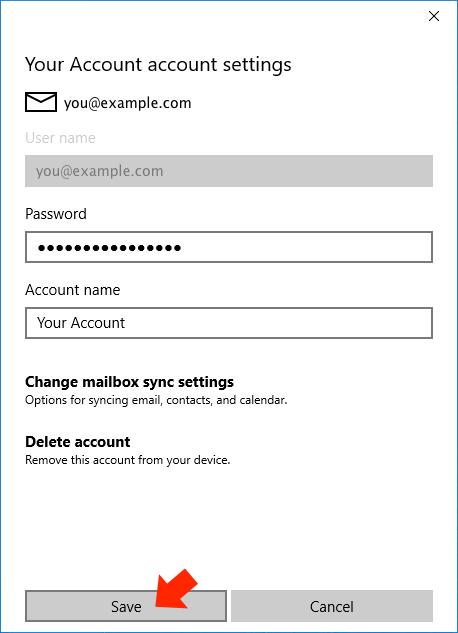
Step Eight
- Click 'Save'
Step Nine
- IMPORTANT: Whilst testing this software we found some issues with the password being saved incorrectly, if you go back into the settings to make any changes please re-enter your AuthSMTP password each time.
- The setup is now complete.
- Send a test message to another email address to make sure everything is working, you should see the message listed in your message history in the control panel.
If you have any questions about the service please contact us .