Outlook (v15.x) for Apple Mac OS X - Setup Guide
Important Points
- First you need to make sure the addresses you will be sending from have been authorised on your account in our Control Panel
- These instructions assume your email account has already been setup and is collecting email correctly
- Make a note of any settings that you change
- Only change the items specified - you should not need to change your email address or POP3 / IMAP settings
- These instructions are only for Outlook for Apple Mac OS X (v15.x) - for other programs see How To Setup AuthSMTP
Step One
- Open the Microsoft Outlook app on your Apple Mac computer

Step Two
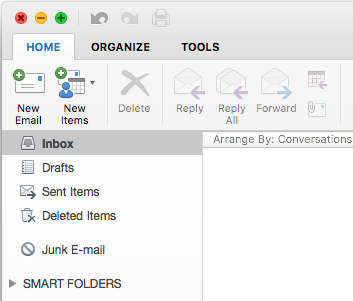
- You should see the following window
Step Three
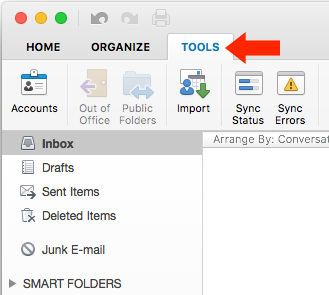
- To access the settings go to the 'Tools' tab
- Click on the 'Accounts' button in the top left-hand corner
Step Four
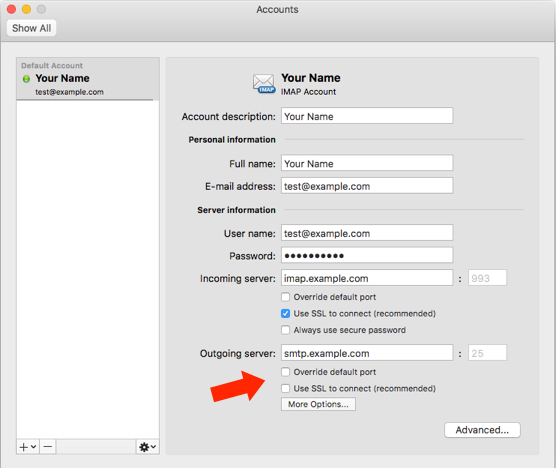
- You will now see a list of accounts setup in Outlook for Mac
- Click on the account you wish to setup with AuthSMTP in the left-hand column
- You will then see the current settings for this account, please make a note of these before making any changes
Step Five
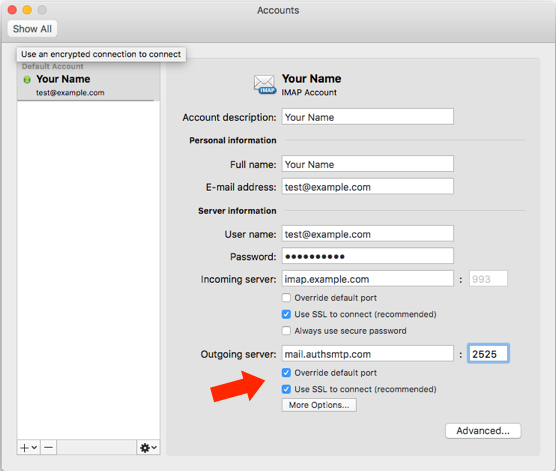
- You can now change the settings to use your AuthSMTP account
- Set the 'Outgoing server' to 'mail.authsmtp.com'
- Tick 'Override default port'
- The default port is '25'
- We recommend that you set this to '2525'
- If you want to test which ports are available from your computer please use our web based SMTP port checker
- Tick 'Use SSL to connect'
- Then click the 'More Options...' button
Step Six
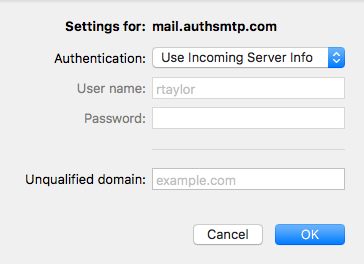
- This section show the details that Outlook for Mac will use to authenticate with the outgoing SMTP server
- Please make a note of these settings before continuing
Step Seven
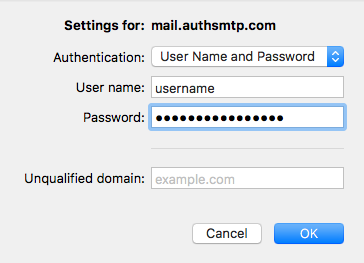
- Please enter your AuthSMTP username and password
- Your username will typically be two letters and five digits (e.g. ac10000)
- It is important to remember that you have two passwords on your account, one for the control panel and one for sending email so it is important that you enter the correct one
- If you want to test your SMTP password please use our web based SMTP authentication checker
- Once you have entered the details click 'OK'
Step Eight
- The setup is now complete, please close the 'Accounts' window and try sending a test message
- If the setup doesn't work for any reason please see our Troubleshooting Guide
