Apple iPhone / iPod Touch - iOS3 - Setup Guide
Are you using a new iPhone or the latest version of iOS? Please see our iOS15 SMTP server setup guide here.
Important Points
- First you need to make sure the email address(es) you will be sending from have been authorised for your account in our Control Panel .
- These instructions assume your email server / account has already been setup and is collecting email correctly.
- Take a note of any settings you change.
- Only change the items specified - you should not need to change your incoming email settings.
- These instructions are only for Apple iPhone and iPod Touch using iOS3- for other email programs please see How To Setup AuthSMTP or contact us.
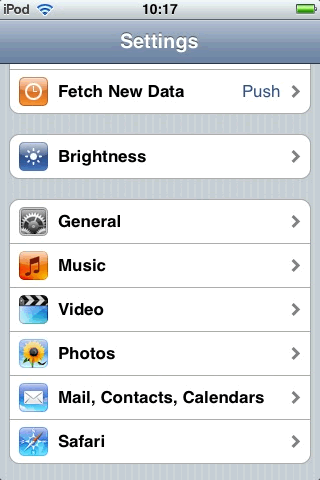
Step 1
- Select 'Settings' from the home page
- Scroll down and Select 'Mail, Contacts, Calendars'.
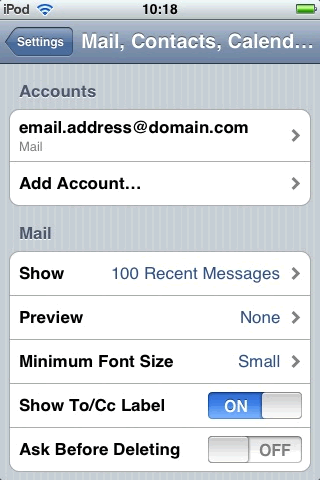
Step 2
- Select the email account to modify.
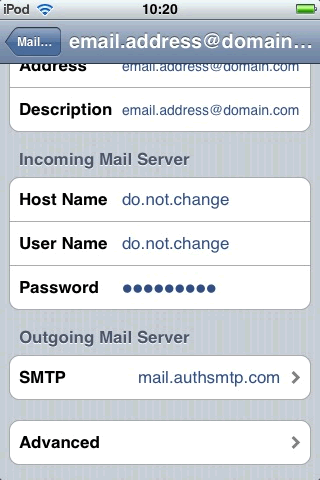
Step 3
- Scroll down to 'Outgoing Mail Server' and click 'SMTP'.
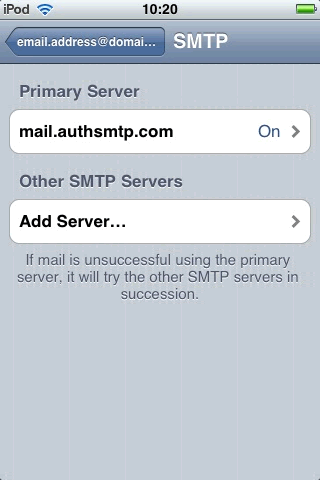
Step 4
- Click on the 'Primary Server'.
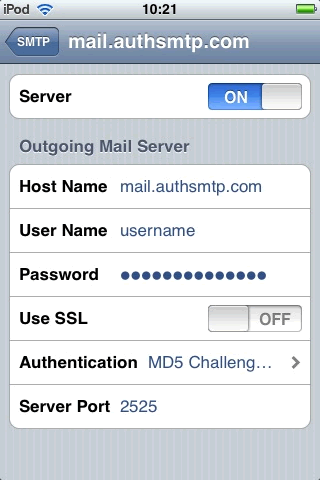
Step 5
- Make sure the slider is 'On' and enter the AuthSMTP host name (as supplied in your signup email).
- Enter the username and password (as supplied in your signup email).
- Change 'Use SSL' to off (unless you do want to use SSL and have already enabled SSL in the AuthSMTP Control Panel).
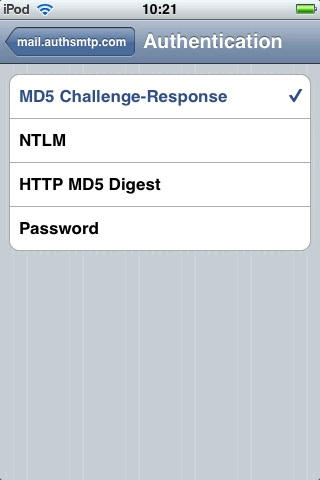
Step 6
- Click on 'Authentication' and select 'MD5 Challenge-Response' - then go back to the previous screen.
Step 7
- Click on the 'Server Port' and change to one of the alternate port numbers - we would recommend that you use port 325 but you can also use 23, 26 or 2525 - port 25 is available but is blocked by many ISPs.
- Use port 325 if you specifically DO NOT want to use SSL encryption.
- If you DO wish to use 'SSL' - move the 'SSL' slider to on, change the port to '2525' and then you MUST login to the control panel (Advanced Configuration tab)and enable SSL on your account.
Step 8
- Go back until you get back to the main 'Settings' page.
- All Done!