Apple iPhone / iPad - iOS17 - Setup Guide
Important Points
- First you need to make sure the address(es) you will be sending from have been authorised on your account in our Control Panel.
- These instructions assume your email account has already been setup and is collecting email correctly.
- Take a note of any settings you change.
- Only change the items specified - you should not need to change your incoming email settings.
- These instructions are only for Apple iPhone / iPad using iOS17 - for other email programs please see How To Setup AuthSMTP.
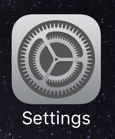
Step 1
- Tap 'Settings' on the home screen
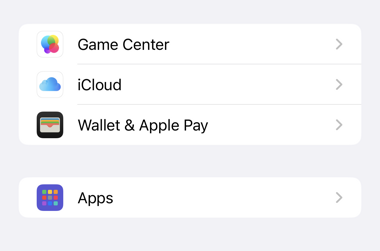
Step 2
- To open the 'Mail' settings, scroll down and Tap 'Apps'.
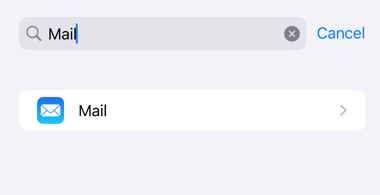
- Search for "Mail" and then tap on the 'Mail' option.
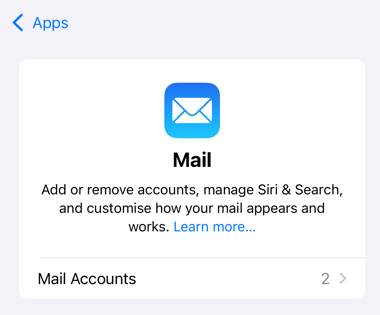
Step 3
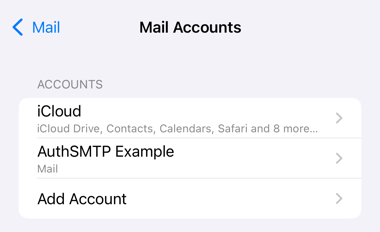
- Tap on 'Mail Accounts'.
Step 4
- Tap the email account you wish to modify.
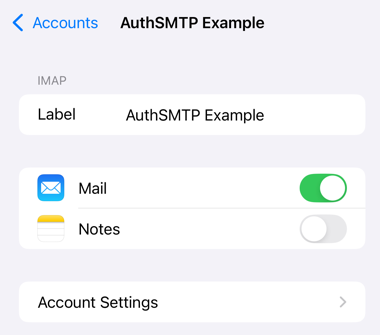
Step 5
- Tap 'Account Settings'
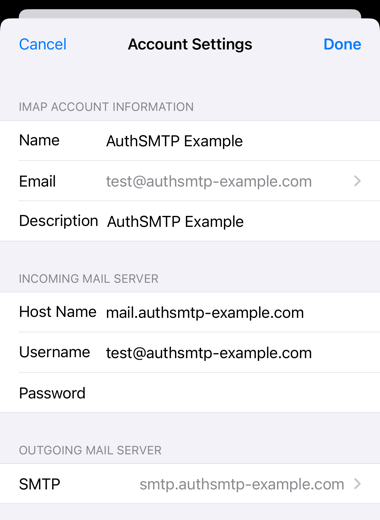
Step 6
- Scroll down to 'Outgoing Mail Server' and tap 'SMTP'.
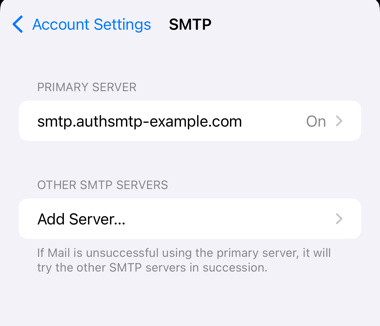
Step 7
- Tap on 'Add Server'.
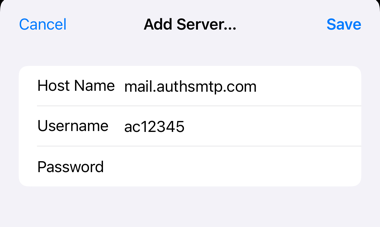
Step 8
- Enter the AuthSMTP host name supplied during the activation process, typically 'mail.authsmtp.com'.
- Enter your AuthSMTP username and SMTP password.
- Click Save
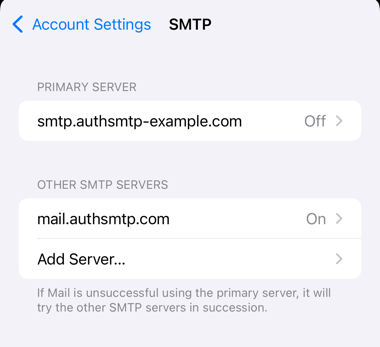
Step 9
- You will now see that your SMTP server has been added.
- Tap on the new server to edit the settings

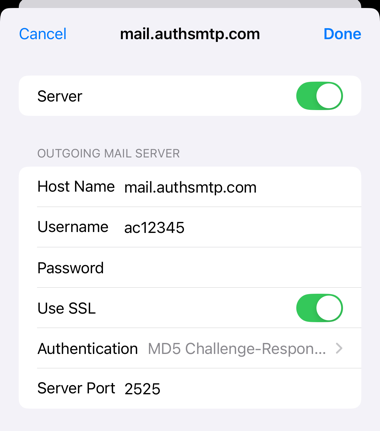
Step 10
- Make sure the 'Server' slider is 'On'
- Set the 'Use SSL' slider to 'On'.
- Set 'Authentication' to 'MD5 Challenge-Response'
- Set the server port to '2525'
- Click 'Done' in the top right-hand corner
Step 11
- Tap on the old 'Primary' server
Step 12
- Set the 'Server' slider 'Off'
- Tap 'Done' in the top right corner

Step 13
- You will now see that the old server is turned off and the new server is on
- Click back to 'Account Settings'
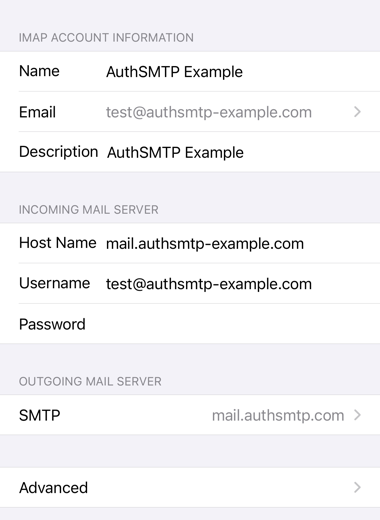
Step 14
- You will now see that he SMTP server is set to 'mail.authsmtp.com'
- Go back until you get back to the main 'Settings' page.
- Setup is complete, try sending a message to ensure it is working correctly.