Infacta GroupMail 6 - Setup Guide
Important Points
- First you need to make sure the email address you will be sending from has been authorised on your account in our Control Panel.
- Take a note of any settings you change.
- Only change the items specified - you should not need to change your incoming email settings.
- These instructions are only for Infacta GroupMail 6.x - for other email programs please see How To Setup AuthSMTP or contact us.
Start
- Open the GroupMail program
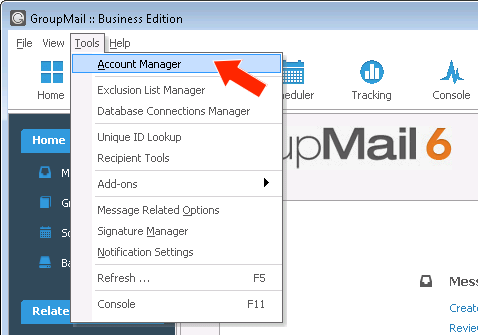
Step 1
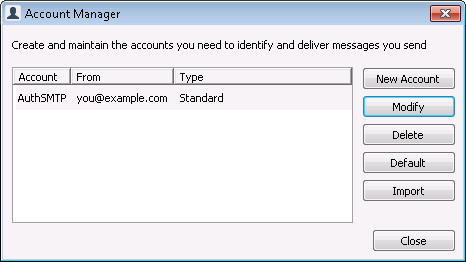
- From the main window - select the 'Tools' menu then click 'Account Manager'
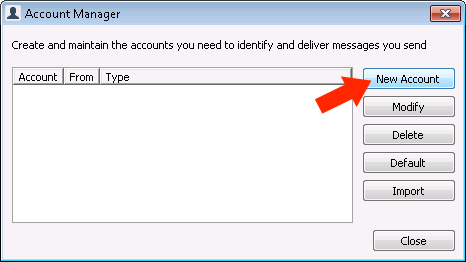
Step 2
- Click 'New Account' to create a new account.
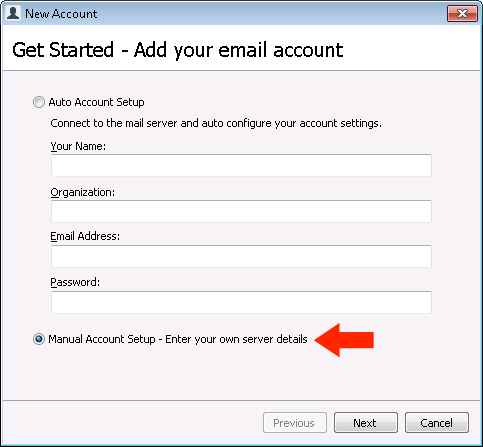
Step 3
- Click 'Manual Account Setup' to create a new account
- Click 'Next'
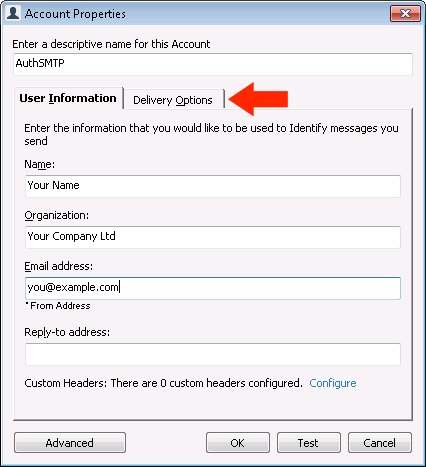
Step 4
- Enter 'AuthSMTP' as a descriptive name for the account
- Enter your name
- Enter your organization name
- Enter your email address (that you will be sending from)
- Enter a reply-to address if it is different from your sender address
- Go to the 'Delivery Options' tab
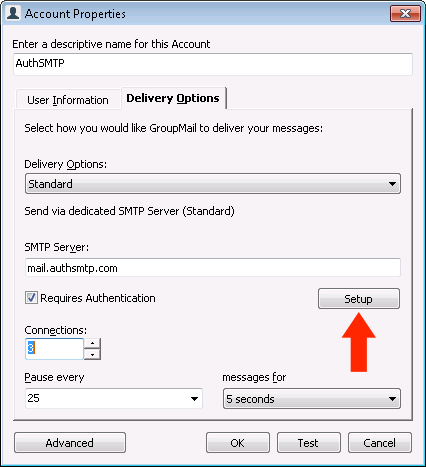
Step 5
- The 'Delivery Options' drop-down menu should be set to 'Standard'
- Set the SMTP server to 'mail.authsmtp.com'
- Tick 'Requires Authentication'
- Keep all other settings the same
- Click 'Setup'
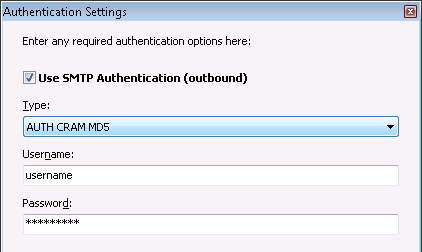
Step 6
- Tick 'Use SMTP Authentication (outbound)'
- Change 'Type' to 'AUTH CRAM MD5'
- Enter your AuthSMTP username and password
- Click 'OK'
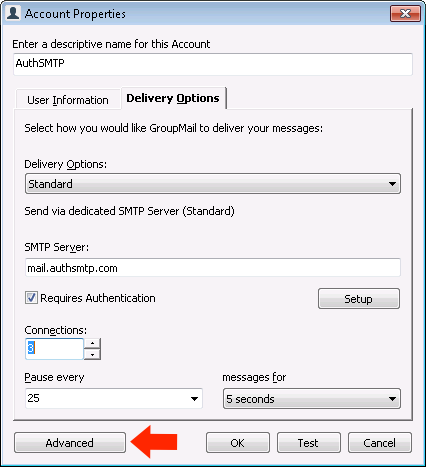
Step 7
- Click 'Advanced'
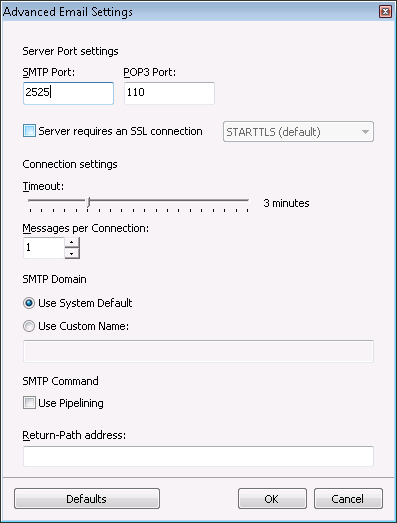
Step 8
- Change the SMTP port to '2525' (other alternatives are 23, 25, 26, 325, 80)
- Keep all other settings the same
- Click 'OK'
Step 9
- Your SMTP account has now been setup
- Click 'Close'
Finish
- The setup is now finished and you can start sending email
- If you experience any problems please see our SMTP troubleshooting guide