Gmail Webmail - Remote SMTP Server - Setup Guide
Important notes about Gmail
- Before proceeding please login to the AuthSMTP Control Panel and enable SSL on your account.
- Due to the way Gmail's systems work you need to have SSL enabled on your account to be able to send emails
- If you do not, any emails you send may not reach us and you may not get an error message
- You cannot use AuthSMTP to send email from your Gmail address using Gmail's webmail
- You cannot use AuthSMTP to send email using Gmail's webmail from a domain name that has it's email services hosted by Google
Instructions
- You need to make sure the email address(es) you will be sending from have been authorised for your account in our Control Panel
- These instructions assume your email account has already been setup in Gmail and is collecting email correctly
- Make a note of any settings you change
- Only change the items specified - you should not need to change anything else in your Gmail account
- These instructions are only for Gmail - for other email programs please see How To Setup AuthSMTP or contact us
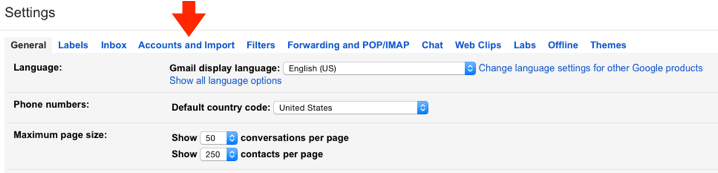
Step One
- Login to your Gmail account
- Click the 'Cog' icon in the top right-hand corner of the Window and then click 'Settings'
- Go to the 'Accounts and Import' tab
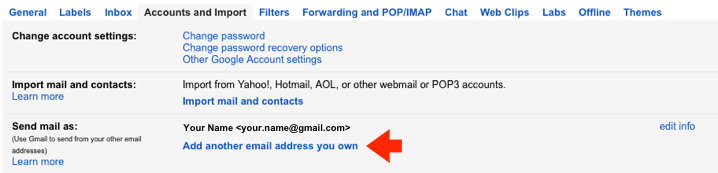
Step Two
- Click on 'Add another email address you own'
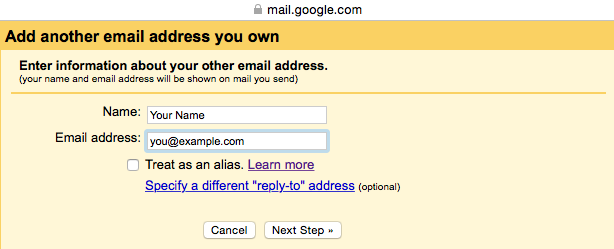
Step Three
- Enter your name
- Enter the email address that you wish to send from
- You will need to make sure you have authorised this email address on your AuthSMTP account
- Untick the option to 'Treat as an alias'
- Click 'Next Step'
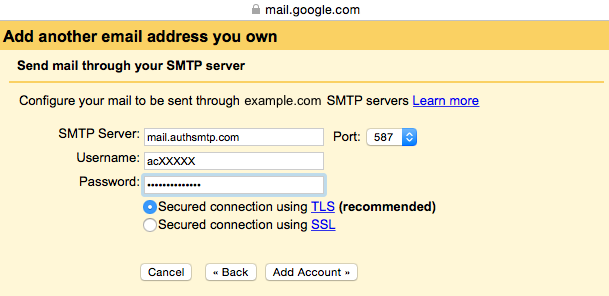
Step Four
- Enter the SMTP server included in your AuthSMTP confirmation email (typically 'mail.authsmtp.com')
- Leave the 'Port' as 587
- Enter your AuthSMTP username and password
- Tick 'Secured connection using TLS'
- Click 'Add Account'
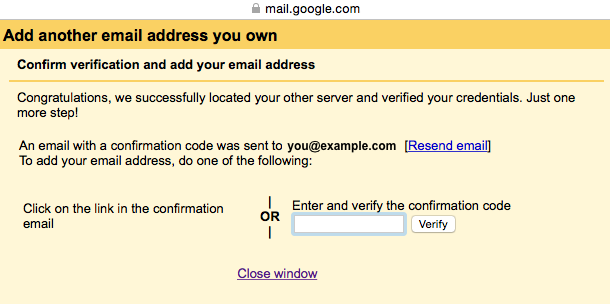
Step Five
- Check the inbox of the email address you are trying to register for the verification email
- Enter the code when requested and click 'Verify' to complete the process
Step Six
- You will now see the new sender account listed under the 'Send mail as' section

- Now when you compose a new message you will have the option to change the from address
- All done!