Microsoft Exchange 2007 - SMTP Connector Setup Guide
Important Points
- First you need to make sure the email address(es) you will be sending from have been authorised for your account in our Control Panel .
- You cannot configure your Exchange server to automatically forward email to a remote email address using your AuthSMTP account, for more information please see - Can I use AuthSMTP to automatically forward email?
- These instructions assume your Microsoft Windows server has already been setup, you have installed Microsoft Exchange Server 2007 and configured your incoming email.
- The guide will walk you through creating a new SMTP Connector for general use, any further configuration to limit use of this connector to specific parts of your network or users is your responsibility, Microsoft can provide you with support for this or see Microsoft's TechNet Website for Exchange 2007 .
- These instructions are only for Microsoft Exchange Server 2007 - for other email programs please see How To Setup AuthSMTP or contact us.
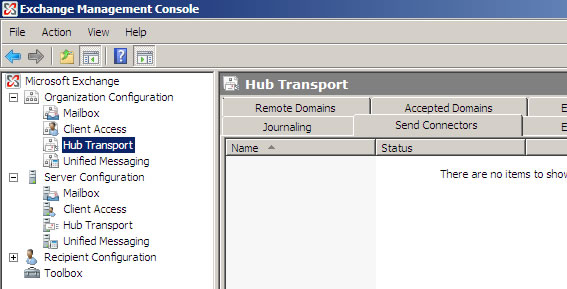
Step One
- Open the 'Exchange Management Console'
- In the configuration tree on the left-hand side open the 'Organisation Configuration' section
- Click on 'Hub Transport'
- In the central window click on the 'Send Connectors' tab
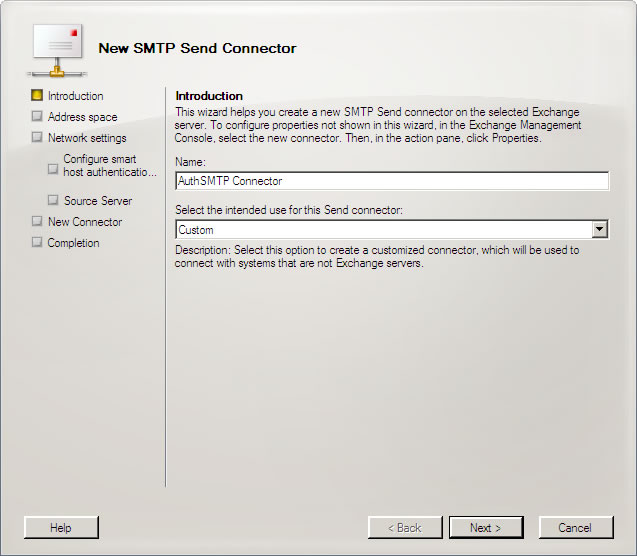
Step Two
- Right-click in the 'Send Connectors' window and select 'New Send Connector'
- We recommend that you name the connector 'AuthSMTP Connector'
- For the type of connector, you will need to select 'Custom' in the drop-down menu
- Click 'Next'
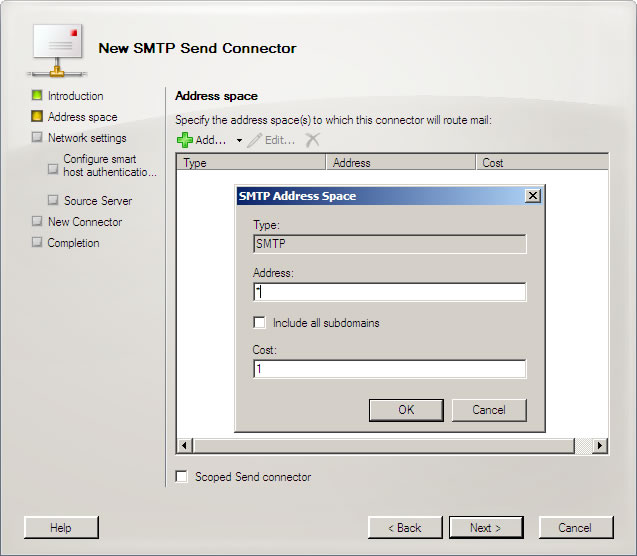
Step Three
- Click on the 'Add' button with the green cross
- Enter '*' in the 'Address:' field
- Click 'Ok' and then click 'Next'
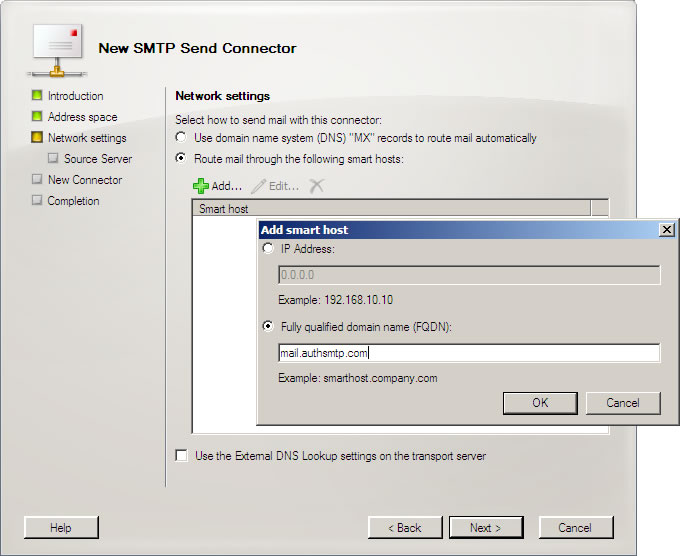
Step Four
- In order to get mail to relay through our servers you will need to setup the 'Smart Host' setting on this screen
- This is what tells Exchange 2007 to deliver all mail destined for the internet though our servers
- Click on 'Route mail through the following smart hosts:'
- Click on the 'Add...' button
- In the 'Add smart host' window click on 'Fully qualified domain name(FQDN):' and enter the SMTP server you have been assigned by AuthSMTP and then click 'OK' and click 'Next'
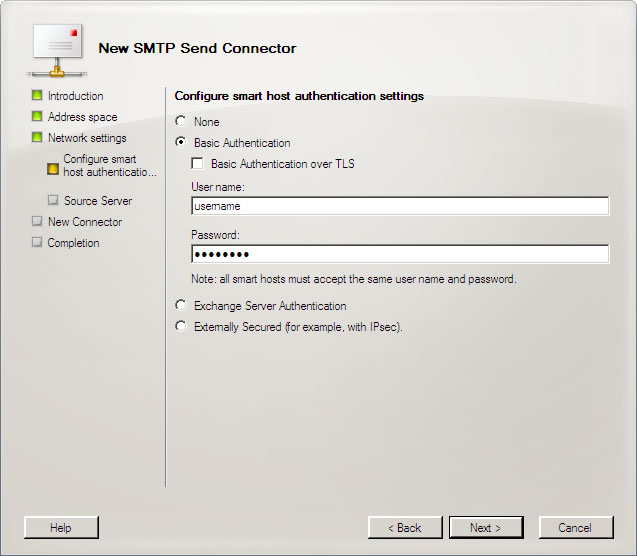
Step Five
- In this window you will need to configure the username and password assigned to you by AuthSMTP
- Click on the 'Basic Authentication' radio button and enter your AuthSMTP username and password
- Do not enable 'Basic Authentication over TLS'
- Click 'Next'
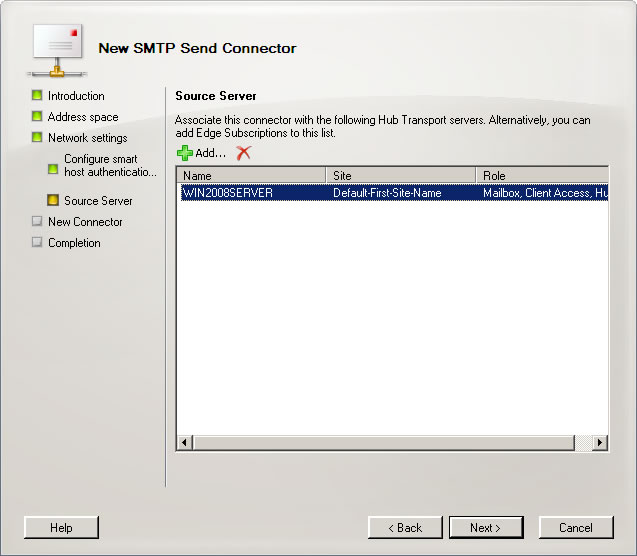
Step Six
- In the next window 'Source Server' you will need to configure which Hub Transport servers and Edge Subscriptions that will use this connector, for the purposes of this tutorial we have just left it with the default single server.
- Click 'Next'
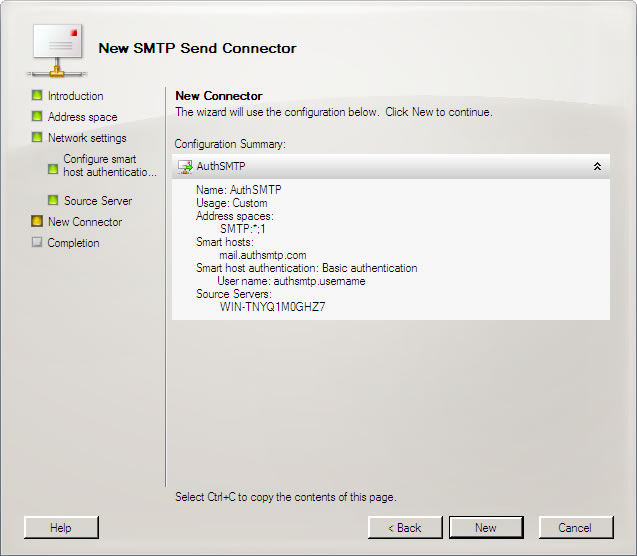
Step Seven
- In the next window it will summarize the details you have entered, please double check that you have entered everything correctly, if you have made a mistake click back and correct it.
- Once you are certain everything is correct click 'New'
- It will then create the connector, click 'Finish'
Step Eight (Important)
- The setup is complete but you now need to decide if you want to send message's using SSL/TLS, action is required either way so please see this additional page on SSL/TLS with Exchange 2007 .